
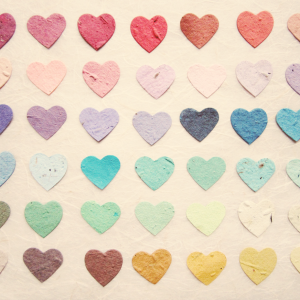
Plantable Seed Paper Hearts
Let your loved ones watch love grow with plantable seed paper hearts! This cute project recycles used materials, grows flowers, herbs or vegetables and puts smiles on the faces of those who receive them! Plantable paper is made with used paper (think newspaper or old printer paper). When the paper is planted in a pot of soil, the seeds grow and the paper composts away.
What you’ll need:
Paper (newspaper, any color construction paper, copy paper, etc)
Warm water
Flower, herb or vegetable seeds
Food coloring (optional)
Heart or other shape cookie cutter (optional)
Mixing bowl
Kitchen blender
Mesh strainer (cheesecloth, etc)
Wax or parchment paper
Paper towels

Get Started: Making the Pulp
- Start by cutting or tearing paper into small pieces (1-2″) and placing them into an empty bowl.
- When all the paper has been cut, pour warm water into the bowl, enough to cover the paper. Let soak for about 2 hours.
Now we’re ready to blend! - Pour the contents of the bowl into a blender and blend until your mixture resembles oatmeal (about one minute*)
*Note: If you notice your paper is not blending well or is looking overly chunky, you may add additional water to the blender or may need to allow the paper to soak longer.
Seeds, add the seeds!
- After a spin in the blender, add your paper/water mixture back into the bowl and stir in your seeds. At this step, you may also stir in food coloring or other visual enhancements like dried flower petals or glitter.
- Now, pour your mixture into mesh strainer and gently squeeze out noticeable excess moisture.**
**Note: Do not squeeze out all excess water, you will want a malleable mixture when molding desired shape.
Any Shape you Want! - Place your desired cookie cutter on a large piece of wax or parchment paper. Take spoonfuls (or handfuls) of your seed/paper/water mixture and place inside the cookie cutter. Spread the mixture as evenly and thinly as possible inside the cutter. The thicker it is, the longer it will take to dry.
- Before removing your cutter and while using a bunched paper towel, press down and squeeze out ANY additional moisture. This will also help to flatten out your design.
- Gently peel away the cutter/mold and repeat until you are out of mixture.
Now the hard part. - WAITING. You must let your new seed paper dry, likely overnight and possibly into the next day. before they are ready.
After your seed paper had dried, you may package them up for gifts, or get planting if you’ve made them for yourself!

Happy Growing!
